


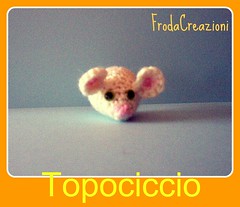
Vi presento un nuovo amico: Topociccio!
E' un piccolo topolino che è spuntato da qualche giorno sulla mia scrivania. Ci si è trovato talmente bene che...

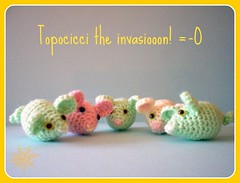
ha portato tutta la sua famiglia!
Ora vi chiederete: "si ma dov'è il regalo?".
Presto detto!
Ecco qui lo schema per creare il vostro Topociccio!
Corpo:
1°giro: 4mb nell’anello magico
2°giro: lavorare *2mb nel prox punto, poi 1mb nel prox punto, ripetere da * - (tot punti 6)
3°giro: lav. *2mb nel prox punto, poi 1mb nei prox 2 punti, rip. da * - (8)
4°giro: lav. *2mb nel prox punto, poi 1mb nel prox punto, rip. da * - (12)
5°giro: lav. 1mb in ogni punto – (12)
6°giro: lav. *2mb nel prox punto, poi 1mb nei prox 2 punti, rip. da* - (16)
7°giro: lav. *2mb nel prox punto, poi 1mb nei prox 3 punti, rip. da * - (20)
8°giro: lav. 1mb in ogni punto - (20)
9°giro: lav. *2mb nel prox punto, poi 1mb nei prox 4 punti, rip. da* - (24)
10 – 11°giro: lav. 1mb in ogni punto - (24)
Ricamate il naso e mettete gli occhi, si inizia a ridurre! =)
12°giro: *ridurre 1, poi 1mb nei prox 4 punti, rip. da * - (20)
13°giro: *ridurre 1, poi 1mb nei prox 3 punti, rip. da * - (16)
14°giro: *ridurre 1, poi 1mb nei prox 2 punti, rip. da * - (12)
Imbottite!
15°giro: *ridurre 1, poi 1mb nel prox 1 punto, rip. da* - (8)
Finite con una maglia bassissima, rimane un piccolo buco, è giusto.
Coda:
1°giro: 13 cat., girate il lavoro
2°giro: 1mb in ogni cat., maglia bassissima nell’ultimo, lasciate un lungo filo alla fine.
Orecchie (x 2):
1°giro: 6mb nell’anello magico
2°giro: 2mb in ogni punto – (12)
Finite con una maglia bassissima e lasciate un lungo filo.
Assemblaggio:
Cucite ora la coda nel piccolo buco chiudendolo bene, in questo modo possiamo far sparire tutti i fili all’interno del topino. Cucite le orecchie dietro gli occhi (come nel modello).

Ecco il vostro nuovo piccolo amico! ^.^
Se dovessero esserci problemi fate un fischio, purtroppo ho difficoltà con gli schemi in italiano, sono abituata all'inglese... =(
Infatti ho creato lo schema in inglese mentre uncinettavo il piccolo amico e mi sono autotradotta in italiano, una fatica!
Ed ora un nuovo esperimento, il primo post in inglese, mi ricorderò qualcosa? O.O
Here's a new friend: Topociccio!
A little mouse that i found on my desk some days ago. Here he feel himself so good that... he called his entire family.
At this moment you can ask "where is the gift?"
So.. here's the pattern to create your Topociccio!
Body:
Rd1: 4 sc in magic ring
Rd2: Work *2 sc in next st, sc in next 1 st, rep from * - (sts 6)
Rd3: Work *2 sc in next st, sc in next 2 sts, rep from * - (sts 8)
Rd4: Work *2 sc in next st, sc in next 1 st, rep from * - (sts 12)
Rd5: Work around - (sts 12)
Rd6: Work *2sc in next st, sc in next 2 sts, rep from * - (sts 16)
Rd7: Work *2sc in next st, sc in next 3 sts, rep from * - (sts 20)
Rd8: Work around – (sts 20)
Rd9: Work *2sc in next st, sc in next 4 sts, rep from * - (sts 24)
Rd10-11: Work around – (sts 24)
Make a nose (a simple X like this), put the eyes (or make the eyes)
Rd12: *dec 1 in next st, sc in next 4 sts, rep from * - (sts 20)
Rd13: *dec 1 in next st, sc in next 3 sts, rep from * - (sts 16)
Rd14: *dec 1 in next st, sc in next 2 sts, rep from * - (sts 12)
Stuff!
Rd15: *dec 1 in next st, sc in next 1 st, rep from * - (sts 8)
Finish with a slst.
Remains a small hole, it’s ok
Tail:
Rd1: Ch 13 turn,
Rd2: Work 1 sc in each st, slst in last and leave a long tail.
Ears (make2)
Rd1: 6 sc in magic ring
Rd2: Work 2 sc in each st – (sts 12)
Finish with a slst and leave a long tail
Sew the tail in the small hole of the body, sew the ears near the eyes, like the model.
Here’s your new friend! =)
If you have any problem, contact me ^.^
This pattern is for personal use only. Please, don't use it for profit. Thanks!
Ciao, è bellissimo e tu sei molto brava, complimenti!
RispondiEliminaveramente carino!! brava!
RispondiEliminama è meraviglioso!!!!
RispondiElimina